Kanelsnegle buns (Danish Cinnamon swirls)
Danish cinnamon swirls or cinnamon snails have a yummy layer of cinnamon sugar filling with butter. Made with yeasted sweet bun dough, which is simpler to use than Danish pastry dough, but equally delicious!

Hands down, these are the simplest cinnamon rolls to make and shape.
After making the sweet bun dough with cardamom, you just roll out the dough. Spread the homemade cinnamon sugar filling, roll it long like a sweet baguette, and cut it into swirls.
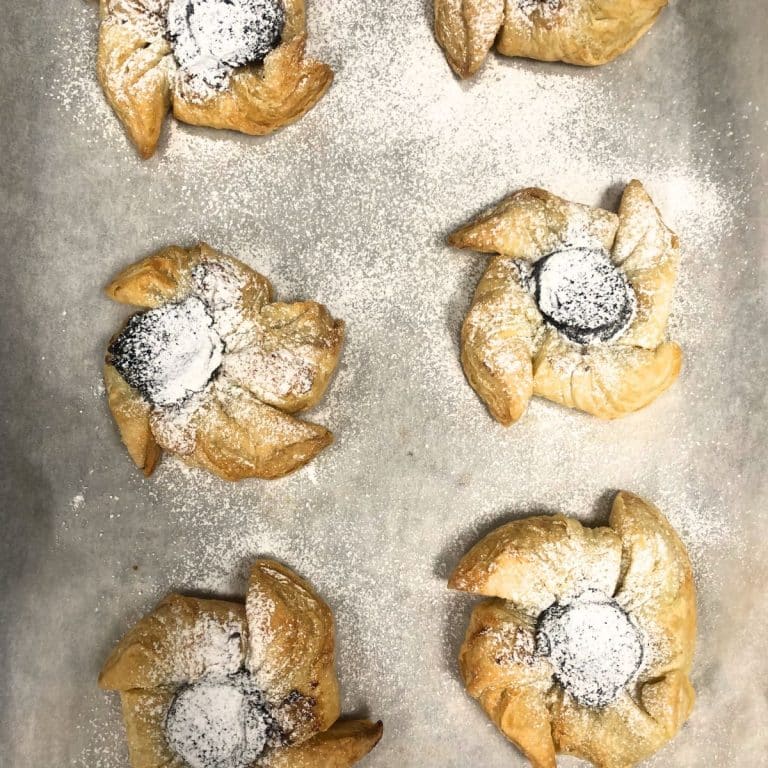
A bit of eggwash brushed and pearl sugar sprinkled.
Done.
If you want to have more challenge, try out my Finnish Korvapuusti, cinnamon roll. On the other hand, even simpler butter eye buns have a sugar-butter eye, instead of a cinnamon filling.
|RELATED: How to roll, twist, knot & shape Scandinavian cinnamon buns
Otherwise, let’s get to it!

Key moments in making the Danish kanelsnegle
- Spread filling evenly, also the edges, to make every bun delicious and not to discard the edges
- Don’t roll too tightly so that the dough will have some space between the layers to rise.
- Use a sharp knife to cut the dough bar to keep the swirls visible. A dull knife will smash the shape and glue the layers into an unrecognisable pattern.
Disclaimer: This post may contain affiliate links, which means if you click on a product or a service and decide to purchase it, I may receive a commission at no extra cost to you. For more information, you can read my full disclaimer.
Ingredients you need for Danish cinnamon snails

- Pearl sugar: To decorate the buns. Pearl sugar is a granulated sugar that does not melt in the oven and is traditionally used in Nordic buns. If you cannot find it, you can substitute it with caster sugar or dust with icing sugar after baking to get that little sweetness on the top of the bun, but it will make a different appearance.
- Caster sugar: Can be substituted with brown sugar both in the dough and in the filling if you want a more caramel-like flavour.
- Cardamom: I use ground cardamom, but if you have cardamom pods, go ahead and use them for a more aromatic flavour!
- Vanilla sugar: can be left out or substituted with 1 tsp vanilla paste.
- Egg: both for the dough and for the eggwash. If you prefer lighter-colored buns, brush the buns with milk instead.
- Wheat flour: You can use all-purpose flour, too.
- Sea salt: It can be substituted with another fine grain salt.
- Soft butter: For the dough and for the filling. Use soft butter at room temperature, so you can easily fold it into the dough and spread it on the out-rolled dough for the filling. Can be substituted with margarine, but notice that margarine is harder in use and doesn’t soften same way as butter does, and does not mix in the dough as well.
You can find the exact measurements on the recipe card.
Short on time?
Pin it for later!
Tools you may need
- Pot, to warm up the milk
- Large bowl, big enough dough to rise double in size
- Measuring spoons
- Scale
- Whisk
- Tea towel
- Oven pan and parchment paper
- Dough cutter or sharp cook knife
- Small brush, to brush the egg wash on the buns
How to make kanelsnegle buns
Step one: Make the bun dough
Heat the milk in a pot to about 40°C (104°F).
TIP: If you are using a glass, ceramic, or metal bowl that is feeling a bit cold, heat the milk a bit warmer so that the milk gives off its heat to warm up the bowl.
Crumble the yeast into milk and whisk lightly to get it to melt in.
Add cardamom, vanilla sugar, sugar, and egg into the milk mixture. Whisk to combine. Add about one-third of the flour and sea salt and combine.

Don’t be tempted to add the salt earlier to not kill the yeast function!
Ditch the whisk and continue kneading with your hand, adding remaining flour gradually. The dough should be rather too sticky than too dry. You might not need to use all the flour, or you may need to add some.
When the dough feels right (it doesn’t stick too much to the sides of the bowl and it has come together nicely), squeeze the room-temperature butter into the dough (my favourite part!).

Fold and knead the butter in nicely until you have a soft dough, and cover with a clean tea towel and let the dough rest at room temperature until doubled in size (about 1 hour).

Step two: Mix the filling

While the dough is resting, prepare the filling. Mix the soft butter, sugar, and ground cinnamon until well combined. Set aside.


Step three: Shape the butter buns
When the dough has risen, knock out the air and pour the Danish cinnamon roll dough on a lightly floured working surface. Divide it into three to make it easier to work with.

Roll out the first dough ball. Use as little flour as you can to avoid a dry bun! You should have a square about 30 x 30 cm (about 12 x 12 inches) large.

Spread a third of the filling on the square. Be generous for the edges as well to have every cinnamon roll – well, to taste like cinnamon!

Roll the dough into a slightly loose bar.

Then cut the bar into 1-2 finger-sized discs (about 10 rolls of one bar). Lay the discs on a parchment paper-lined oven tray, the swirls facing upwards.


Repeat with the rest of the dough.
Step four: Second proof
Cover the buns with a tea towel so that they do not dry. Let them proof for 10-15 minutes up to half an hour in a warm place.

Step five: Bake in the oven
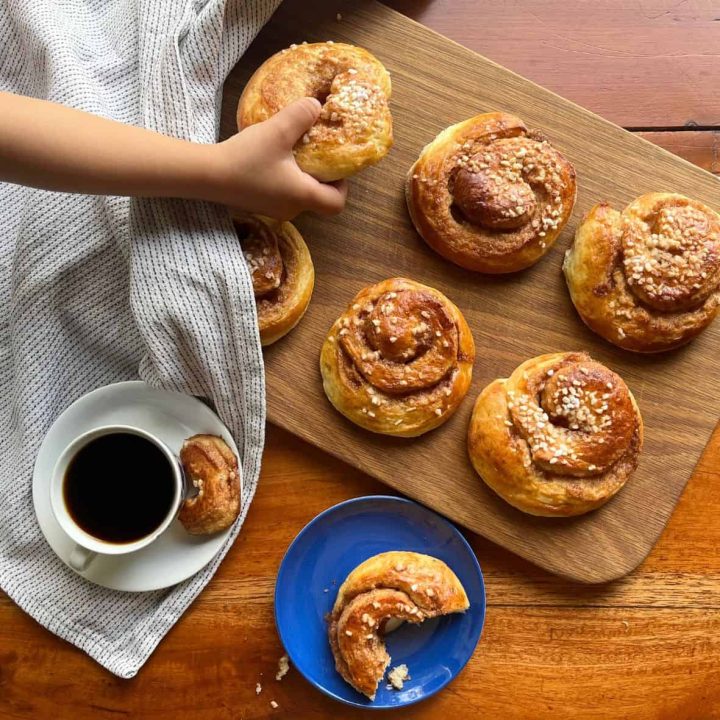
Turn on the oven to 225°C (437°F). When the Danish cinnamon swirls have risen beautifully, give them a bit of eggwash treatment and sprinkle the sugar pearls.


Bake the cinnamon swirls in the oven for 8-10 minutes until golden brown and yummy looking.

Serving and eating the cinnamon swirls
Everyone has their own style of eating the Cinnamon swirls or snails. Some take a huge bite, some dunk in black coffee. I do peel one swirl layer at a time to save the yummiest core part last. Let me know in the comments your style! And don’t forget to share your Danish kanelsneglar (plural form!) on Instagram and tag me with @blue.tea.tile.

How to store the cinnamon snails
I advise always to eat as many Cinnamon snails as you can when they are fresh from the oven and at their best. But 30 buns are not a small amount to swallow in one sitting, so if you are not having a bun party, toss them in the freezer. They are good up to 6 months, and when you want to eat them, stick them straight into a hot oven and let them melt until soft and warm. Almost as good as freshly baked.
How to tweak this recipe
- Swap the white caster sugar for brown sugar for more caramel-flavoured cinnamon buns.
- Use cardamom instead of cinnamon to make some cardamom swirls.
- Use oat milk instead of cow milk to make these buns dairy-free.
You can find the recipe card below!
Short on time?
Pin it for later!
Kanelsnegle Buns (Danish Cinnamon Snails)
Danish cinnamon swirls or cinnamon snails have a yummy layer of cinnamon sugar filling with butter. Made with yeasted sweet bun dough, which is simpler to use than Danish pastry dough, but equally delicious!
Ingredients
Sugar bun dough
- 0.5 L whole milk
- 50 g fresh yeast
- 200 g caster sugar
- 1 tbsp cardamom
- 1 tbsp vanilla sugar (optional)
- 1 egg
- 200 g soft butter (room temperature)
- 1.5 tsp sea salt
- 790 g wheat flour (or more if needed)
Cinnamon filling
- 100 g soft butter (room temperature)
- 150 g caster sugar
- 1.5 tbsp ground cinnamon
- pinch of salt (if you are using unsalted butter)
Topping
- Egg, for egg wash
- Pearl sugar
Instructions
- Step one: Make the bun dough
Heat the milk in a pot to about 40°C (104°F).
| TIP: If you are using a glass, ceramic, or metal bowl that feels a bit cold, heat the milk slightly so that it gives off its heat to warm up the bowl.
Crumble the yeast into the milk and whisk lightly to help it dissolve.
Add cardamom, vanilla sugar, sugar, and egg into the milk mixture. Whisk to combine. Add about one-third of the flour and sea salt and combine.
Don’t be tempted to add the salt earlier, so as not to kill the yeast function!
Ditch the whisk and continue kneading with your hand, adding remaining flour gradually. The dough should be rather too sticky than too dry. You might not need to use all the flour, or you may need to add some.
When the dough feels right (it doesn’t stick too much to the sides of the bowl and it has come together nicely), squeeze the room-temperature butter into the dough (my favourite part!).
Fold and knead the butter in nicely until you have a soft dough, and cover with a clean tea towel and let the dough rest at room temperature until doubled in size (about 1 hour). - Step two: Mix the filling
While the dough is resting, prepare the filling. Mix the soft butter, sugar, and ground cinnamon until well combined. Set aside. - Step three: Shape the butter buns
When the dough has risen, knock out the air and pour the Danish cinnamon roll dough on a lightly floured working surface. Divide it into three to make it easier to work with.
Roll out the first dough ball. Use as little flour as you can to avoid a dry bun! You should have a square about 30 x 30 cm (about 12 x 12 inches) large. Spread a third of the filling on the square. Be generous for the edges as well to have every cinnamon roll - well, to taste like cinnamon!
Roll the dough into a slightly loose bar and cut it into 1-2 finger-sized discs (about 10 rolls of one bar). Lay the discs on a parchment paper-lined oven tray, the swirls facing upwards.
Repeat with the rest of the dough. - Step four: Second proof
Cover the buns with a tea towel so that they do not dry. Let them proof for 10-15 minutes up to half an hour in a warm place. - Step five: Bake in the oven
Turn on the oven to 225°C (437°F). When the Danish cinnamon swirls have risen beautifully, give them a bit of eggwash treatment and sprinkle the sugar pearls, and bake in the oven for 8-10 minutes until golden brown and yummy looking. - Serving and eating the Cinnamon swirls
Everyone has their own style of eating the Cinnamon swirls or snails. Some take a huge bite, some dunk in black coffee. I do peel one swirl layer at a time to save the yummiest core part last. Let me know in the comments your style! And don't forget to share your Danish kanelsneglar (*plural* *form*!)in the Instagram and tag me with [@blue.tea.tile](https://www.instagram.com/blue.tea.tile/)
How to store the cinnamon snails
I advise always to eat as many Cinnamon snails as you can when they are fresh from the oven and at their best. But 30 buns are not a small amount to swallow in one sitting, so if you are not having a bun party, toss them in the freezer. They are good up to 6 months, and when you want to eat them, stick them straight into a hot oven and let them melt until soft and warm. Almost as good as freshly baked.
Notes
- Step-by-step photos that go along with the instructions can be found higher in this post.
- Check the header "How to tweak this recipe" to adjust the buns to your liking.
- Make sure you check these Key Moments in the making process to succeed with your kanelsnegle.
Nutrition Information:
Yield: 30 Serving Size: 1Amount Per Serving: Calories: 236Total Fat: 9gSaturated Fat: 6gTrans Fat: 0gUnsaturated Fat: 3gCholesterol: 42mgSodium: 201mgCarbohydrates: 34gFiber: 1gSugar: 13gProtein: 4g
These calculations are generated automatically by Nutritionix based on the ingredients shown in the recipe. The nutrition information is an estimation and may include errors. All nutritional information presented and written within this site (blueteatile.com) is intended for informational purposes only. The writer is not a certified nutritionist or registered dietitian and any nutritional information should be used as a general guideline only.