Delicious chives spread with cream cheese and quark
Learn to make an easy chive spread that is a delicious topping on any bread. It is a quick and versatile recipe that you can tweak endlessly!

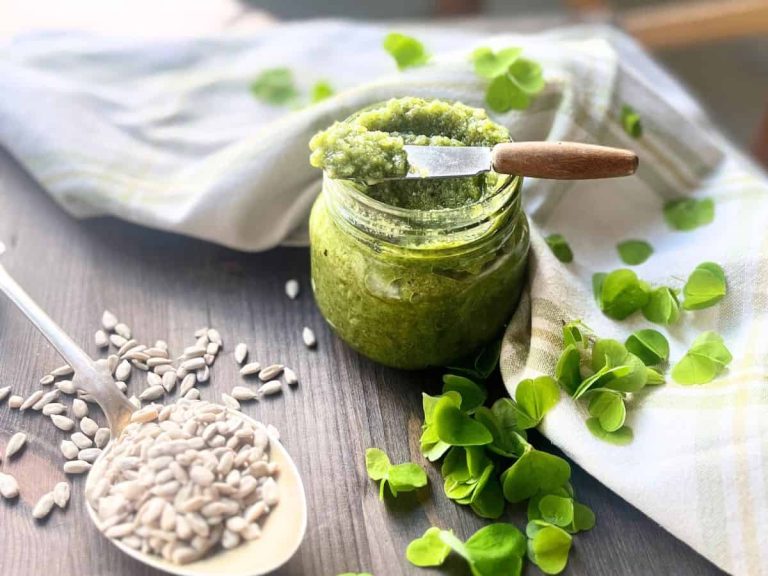
My favorite way to use the chives in our balcony garden is this no-fuss recipe of chive spread. The chive cheese spread is a creamy spread that I have turned into a slightly healthier version by adding the quark in it – which actually fits in oh so perfectly.
| RELATED: Spreads, pastes and toppings
Why you’ll love this recipe
- It is a quick and easy, no-fuss recipe, that you can do literally in 10 minutes or so.
- It makes two jars of 4dl, so you can fill up the jars and have your spreadable chives cream cheese for a few weeks.
- You can tweak this recipe and add your favorite herbs.

Ways to increase the shelf life
- Clean well the glass jars you are using.
- Fill all the way up – leave no space for air.
- Use several small jars instead of one big one, to decrease the contact with the air.
- Cut the chives not the tiniest cut but a bit bigger so there’s less water that enters the mixture when the chives remain in good condition and don’t get mushy.
- Use always a clean knife or spoon when taking from the jar, to minimize the bacteria entering the jar.

Short on time?
Pin it for later!
What are chives?
The chive plant is a hollow grass-looking onion plant. It is one of the plants that you can find in your garden in early spring or early summer and the growing season continues throughout the whole summer up til autumn. It has a mild onion flavor and it is perfect to use fresh and uncooked. Use the chives before it makes the beautiful chive blossoms, the energy of the chives goes into the blooming so it compromises the flavor a bit.
Thanks to its mild flavor it is so much more approachable and appealing in cream cheese spreads than red onion or yellow onion. To get the best result and fresh flavor always use freshly picked chives when possible.
Chives are perfect to use in spreads, salads, and salad dressings. It is a beautiful addition to decorate any portion, to be honest!
Ingredients you need for chives spread
- Quark, choose an unfavored natural quark.
- Fresh cream cheese, unflavoured. I like to use Philadelphia, it has a nice structure.
- Fresh chives, use the ones straight from your herb garden, shop-bought, or from the farmer’s market. If you buy loot for organic chives. You can substitute chives with spring onions, but you’ll need to chop them more fine then.
- Sea salt, can be substituted with any other salt.
- Black pepper, ground. The best and most fresh result you get when you use whole black pepper and grind it just before using.
The exact measurements you can find on the recipe card.

Tools you may need
- Large bowl and big spoon for mixing
- Cooks knife and cutting board
- Measuring spoons
- Scale
- Two glass jars with an airtight lid
| RELATED: My master list of tools and resources
How to make chives spread
Step one: Mixing
Pour cream cheese into the big bowl and mix it a bit to make it easier to mix with the quark. When cream cheese is runnier add the quark and mix well through so that you cannot see the color difference and it is homogenous.


Step two: Seasoning
Cut chives finely, add to the mixture, and combine well. Add salt and pepper to the taste.

How to enjoy and use the chive cream cheese spread
- Spread on a rye bread or a sourdough carrot flatbread.
- Spread on a tortilla before adding other ingredients.
- Drop a dollop in a soup like Borsh, the beetroot soup.
- Add to a crêpe to make savory crêpes and fill them with avocado-tomato salad and red onion.

| RELATED: Sourdough flatbread with carrots
Storage and making ahead
This recipe makes two jars of 4 dl. I have found that to increase the shelf life, it is better to fill two smaller jars instead of one. You can fill even three or four if that is better for you. Make sure the jars are clean and filled all the way up so that there’s no space for air left. Start with the jar that is not completely full. Open the next jar when you are ready with the first one. Also, make sure you use a clean knife when you take the spread from the jar to keep the shelf life of the opened one to at least one week. The closed ones will stay good for at least two weeks. This chives spread does not freeze and thaw well.
How to tweak this recipe
- Add some crushed garlic or garlic powder.
- Chop in other fresh herbs like parsley, coriander, basilica, or oregano!
- Match it with a salmon salad and swap the chives for dill instead.

Little Helper
In this recipe the most fun thing is mixing, the ingredients aren’t that many, but the mixing can continue for a long time without messing up the recipe. An interesting part for a tiny chef is how the chives enter and vanish into the twirls of cream cheese and quark.
What combinations you prefer?
Should it be chives or basilica? Parsley or dill? What is your favorite? Let me know in the comments from which herb becomes the best spread!

Short on time?
Pin it for later!

Chives Spread
Learn to make an easy chives spread that is a delicious topping on any bread. It is a quick and versatile recipe that you can tweak endlessly!
Ingredients
- 500 g unflavoured natural quark
- 300 g unflavoured fresh cream cheese
- 30g fresh chives (a bunch)
- 1/2 tsp sea salt
- 1/4 tsp ground black pepper
Instructions
- Step one: Mixing
Pour cream cheese into the big bowl and mix it a bit to make it easier to mix with the quark. When cream cheese is runnier add the quark and mix well through. - Step two: Seasoning
Cut chives finely, add to the mixture, and combine well. Add salt and pepper to the taste.
Storage and making ahead
This recipe makes two jars of 4 dl. I have found that to increase the shelf life, it is better to fill two smaller jars instead of one. You can fill even three or four if that is better for you. Make sure the jars are clean and filled all the way up so that there’s no space for air left. Start with the jar that is not completely full. Open the next jar when you are ready with the first one. Also, make sure you use a clean knife when you take the spread from the jar to keep the shelf life of the opened one to at least one week. The closed ones will stay good for at least two weeks.
Notes
- To find more suggestions on how to adjust the recipe to your liking look for the "How to tweak this recipe" header in the post.
- More tips on storing the chives you’ll find under the header "Ways to increase the shelf life"
- Tips on how to enjoy the chives spread can be found under the header "How to enjoy and use the chive cream cheese spread"
Nutrition Information:
Yield: 16 Serving Size: 1Amount Per Serving: Calories: 85Total Fat: 7gSaturated Fat: 4gTrans Fat: 0gUnsaturated Fat: 2gCholesterol: 21mgSodium: 143mgCarbohydrates: 2gFiber: 0gSugar: 2gProtein: 4g
These calculations are generated automatically by Nutritionix based on the ingredients shown in the recipe. The nutrition information is an estimation and may include errors. All nutritional information presented and written within this site (blueteatile.com) is intended for informational purposes only. The writer is not a certified nutritionist or registered dietitian and any nutritional information should be used as a general guideline only.


Oooh just what I was looking for. I’m trying this out, thanks for the recipe.
Good that you found it! Let me know how it turned out! If you share it on Instagram tag me with @blue.tea.tile so I can see it too <3
I love cream cheese and this looks so good! I didn’t realize that filling the jar up to the top would help with bacteria getting in. Very useful, thank you!
Glad you liked it, Laurel!
Looks like something I would love as I love cream cheese. Hope to try making this.
Cream cheese is so yummy! That’s why it is so nice that it actually is so easy to make at home. Thanks for sharing Rosie!
This recipe is gonna go so well with the bagels I will be baking.
Thanks for sharing!
That sounds just perfect! If you share a photo of your bagels tag me with @blue.tea.tile and keep me posted!